How can I repair a motherboard?
Is your computer acting up? Don’t panic! You might be able to fix it by repairing the motherboard. In this guide, we’ll walk you through the process step by step, using simple language and avoiding technical jargon. From diagnosing common issues to advanced repair techniques, we’ve got you covered.
Basic Motherboard Repair Techniques
Is your motherboard giving you trouble? Before you give up and buy a new one, there are some basic repair techniques you can try to get it up and running again. In this section, we’ll explore three common motherboard repair techniques: cleaning, testing, and replacing faulty capacitors, and reseating or replacing memory modules and expansion cards.
Cleaning the Motherboard
Dust and debris can accumulate on the motherboard over time, causing poor performance or even failure. Cleaning the motherboard is a simple yet effective repair technique. Here’s how you can do it:
- Power Off: Make sure your computer is turned off and unplugged from the power source before cleaning the motherboard.
- Remove Dust: Gently use a can of compressed air or a soft brush to remove dust and debris from the motherboard. Pay close attention to the slots, connectors, and heat sinks.
- Clean with Isopropyl Alcohol: If there are stubborn stains or residue on the motherboard, dampen a lint-free cloth with isopropyl alcohol and gently wipe the affected areas. Ensure the alcohol has evaporated completely before powering on the computer.
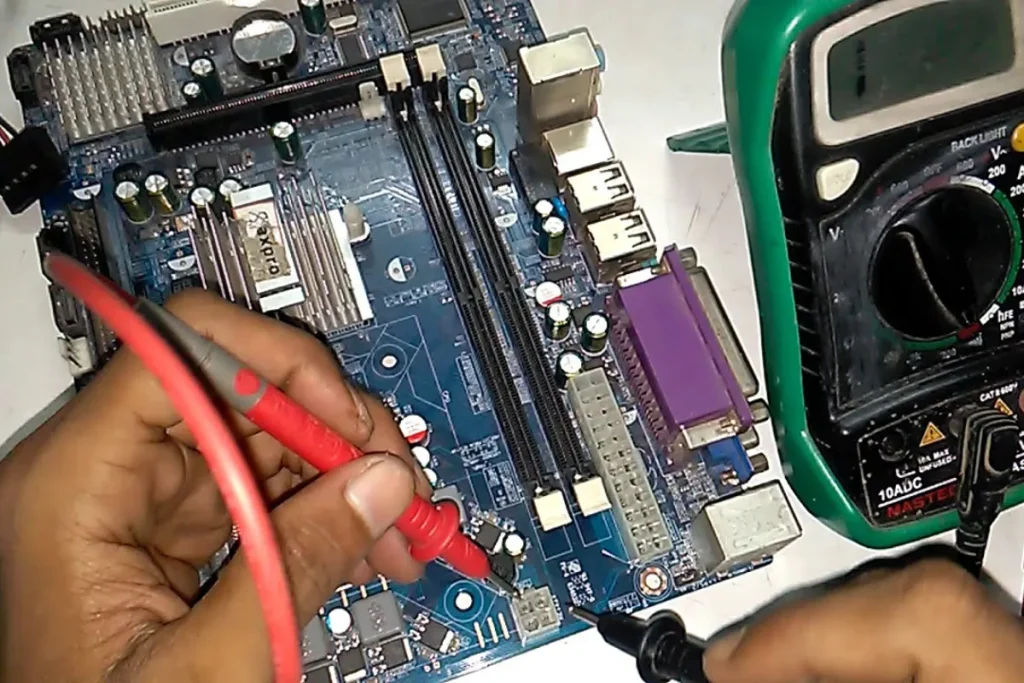
Testing and Replacing Faulty Capacitors
Capacitors are small cylindrical components on the motherboard that store electrical energy. When they fail, they can cause a range of issues. Here’s how you can test and replace faulty capacitors:
- Visual Inspection: Inspect the capacitors on the motherboard for any signs of bulging, leaking, or damage. Faulty capacitors often have a swollen appearance.
- Testing with a Multimeter: If you suspect a capacitor is faulty, you can use a multimeter to test its capacitance and resistance. Follow the manufacturer’s instructions and compare the readings with the specifications.
- Replacing Faulty Capacitors: If you find faulty capacitors, you can replace them by desoldering the old ones and soldering new capacitors in their place. This requires soldering skills and proper tools.
Reseating or Replacing Memory Modules and Expansion Cards
Sometimes, faulty connections between memory modules or expansion cards and the motherboard can cause issues. Here’s how you can address this:
- Reseating: Remove the memory modules and expansion cards from their slots. Clean the contacts with a soft, lint-free cloth. Then, reseat them firmly back into their respective slots.
- Replacing: If reseating doesn’t solve the problem, try replacing the memory modules or expansion cards with known-good ones. This helps identify if the issue lies with the components themselves.
Advanced Motherboard Repair Techniques
If you’re looking to tackle more complex motherboard issues, this section will explore advanced repair techniques. We’ll delve into troubleshooting power-related issues, repairing or replacing damaged components, and using soldering techniques to fix broken traces or connectors.
Troubleshooting Power-Related Issues and Testing the Power Supply Unit (PSU)
Power-related issues can cause a range of problems on a motherboard. To address these issues and test the power supply unit (PSU), follow these steps:
- Visual Inspection: Inspect the motherboard for any visible signs of burnt components, blown capacitors, or damaged power connectors. These can indicate power-related issues.
- Testing the PSU: Use a multimeter to test the output voltages of the power supply unit. Compare the readings with the manufacturer’s specifications to ensure the PSU is delivering the correct power.
- Testing with a Known-Good PSU: If the PSU tests fail or you suspect it’s faulty, try replacing it with a known-good power supply to see if the issues persist. This helps determine if the problem lies with the PSU or elsewhere.
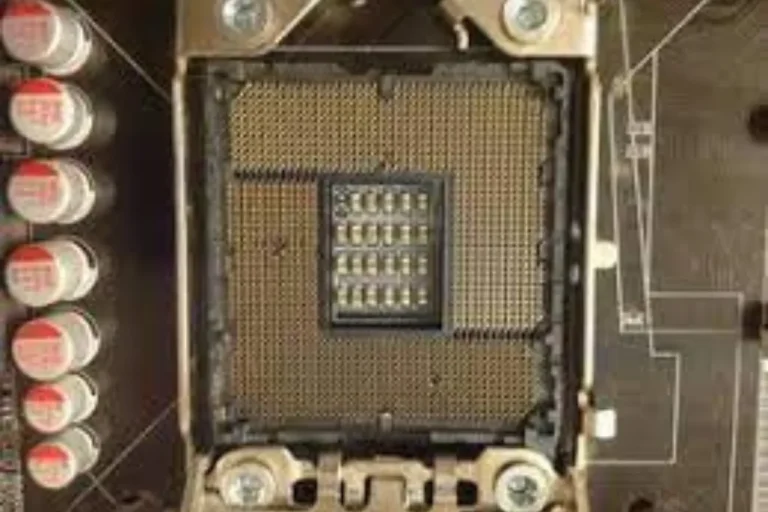
Repairing or Replacing Damaged or Broken Motherboard Components
Sometimes, motherboard components can become damaged or broken, leading to malfunctions. To address these issues, follow these steps:
- Identify the Damaged Component: Carefully inspect the motherboard for any visibly damaged or broken components, such as resistors, capacitors, or chips. Take note of the specific components that require repair or replacement.
- Order Replacement Components: Identify the exact specifications of the damaged components and order suitable replacements. Ensure compatibility with the motherboard and follow proper handling procedures.
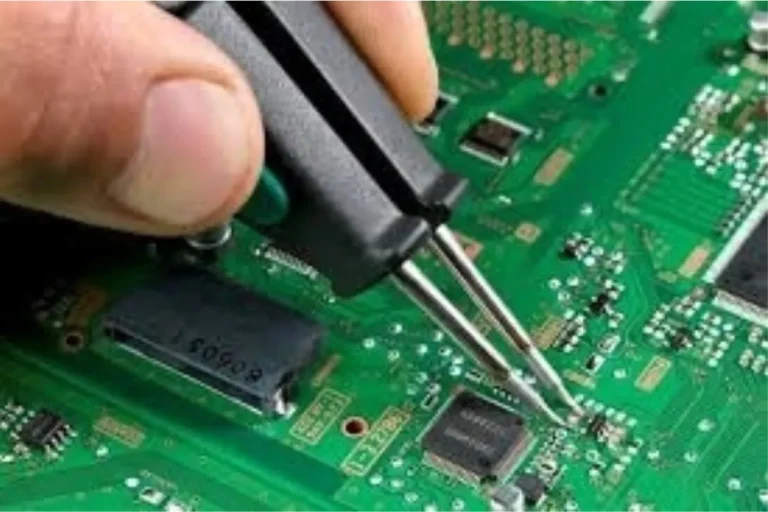
- Desoldering and Soldering: Use a soldering iron and desoldering tools to remove the damaged components from the motherboard. Then, solder the new components in their place, ensuring proper connections and avoiding overheating.
Soldering Techniques for Fixing Broken Traces or Connectors
In some cases, the motherboard may have broken traces or connectors that need repair. Here’s how you can employ soldering techniques to fix them:
- Identify the Broken Traces or Connectors: Inspect the motherboard closely for any broken traces (thin copper lines) or damaged connectors. Mark the locations that require repair.
- Clean and Prepare the Area: Use a small brush and isopropyl alcohol to clean the damaged area. Remove any dirt, debris, or old solder to ensure a clean surface for soldering.
- Repair with Soldering: Apply a small amount of flux to the damaged area. Use a soldering iron and solder to bridge the broken traces or repair the connectors. Ensure proper connections and avoid creating solder bridges between adjacent traces.
Frequently asked questions
1. How can I update the BIOS firmware for compatibility and stability?
To update the BIOS firmware, visit the motherboard manufacturer’s website and download the latest BIOS version for your specific motherboard model.
2. How can I troubleshoot driver-related issues using the device manager?
Open the Device Manager by pressing Windows key + X and selecting Device Manager from the menu. Look for any devices with yellow exclamation marks, indicating driver issues.
3. What can I do to resolve motherboard conflicts through system configuration settings?
Open the System Configuration utility by typing “msconfig” in the Windows search bar and selecting the “System Configuration” app.
4. Are BIOS updates risky?
BIOS updates carry some risk, as an improper update can cause system instability. It’s crucial to follow the manufacturer’s instructions precisely and ensure your computer has a stable power source during the update.
5. What should I do if I encounter a Blue Screen of Death (BSOD) related to the motherboard?
When facing a BSOD related to the motherboard, start by rebooting your computer. If the issue persists, try booting into Safe Mode and updating your motherboard drivers.
Conclusion
repairing a motherboard can be a complex task, but with the right techniques and precautions, it’s possible to tackle common issues. From troubleshooting power-related problems to replacing damaged components, and even using soldering techniques, there are solutions available. Remember to research, follow instructions carefully, and seek professional help if needed.