How do you turn on a motherboard without a power button?
Or maybe you’re building a custom PC and haven’t connected the power button yet. Don’t worry, we’ve got you covered! In this guide, we’ll show you some nifty tricks to turn on your motherboard without a power button. No need to panic, we’ll make it easy-peasy!
Using the BIOS Jumper
One of the methods to turn on a motherboard without a power button is by utilizing the BIOS jumper. This small yet powerful component, known as the BIOS (Basic Input/Output System) jumper, plays a crucial role in your computer’s functioning.
Explanation of the BIOS Jumper
The BIOS jumper is a tiny plastic cap that connects two pins on the motherboard. It is typically used to reset the BIOS settings to their default values. However, it can also be used as a workaround to power on the motherboard when the power button is not available or functional.
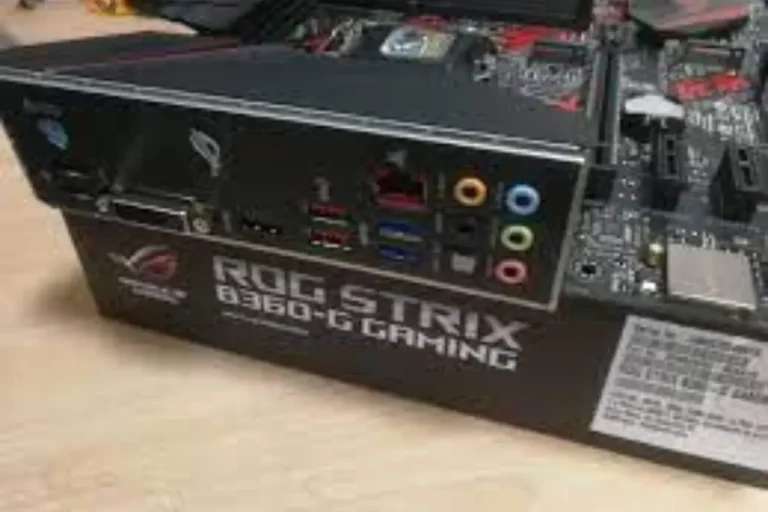
To locate the BIOS jumper on your motherboard, you will need to refer to its user manual or the manufacturer’s website. The jumper is usually found near the CMOS battery or the BIOS chip. It is a small, rectangular plastic cap that covers two metal pins.
Step-by-step Guide
- Before proceeding, ensure that your computer is unplugged from the power source.
- Locate the BIOS jumper on your motherboard. Refer to the user manual or manufacturer’s website for its exact location.
- Take note of the current position of the BIOS jumper. It is typically placed on two pins, labeled as “Clear CMOS” or something similar.
- Gently remove the BIOS jumper cap from its current position using your fingers or a pair of tweezers.
- Carefully place the BIOS jumper cap on the adjacent pins. These pins are usually labeled as “Normal” or “Default.”
- Once the BIOS jumper is adequately positioned, plug in your computer to the power source.
- Press the power button, and your motherboard should now turn on.
- After your computer has successfully booted, you can restore the BIOS jumper to its original position by moving the cap back to the initial pins.
- Finally, plug out your computer from the power source and reconnect any disconnected cables or components.
Using a Screwdriver
When your computer’s power button fails to function, you need to get creative. One ingenious method is using a trusty screwdriver to “short” the motherboard and activate the power. It may sound a bit unconventional, but with the right steps, you can easily turn on your motherboard without the power button.
“Shorting” the Motherboard
“Shorting” the motherboard refers to the process of creating a temporary connection between two specific pins to trigger the power-on mechanism. By using a screwdriver, you can bridge these pins and effectively power up your motherboard.
Detailed Instructions:
- Before you begin, ensure that your computer is not connected to any power source.
- Identify the two power pins on your motherboard. These pins are usually labeled as “Power SW” or “Power Switch” and are located near the front panel connectors.
- Take note of the exact location of these power pins. They are typically small, metal pins protruding from the motherboard.
- With the computer still unplugged, take a screwdriver and carefully touch the tip to both power pins simultaneously. This creates a temporary connection.
- Hold the screwdriver in place for a few seconds, allowing the connection to activate the power.
- Once you have bridged the power pins, you can safely remove the screwdriver.
- Connect your computer to the power source and press the power button to start your motherboard.
- If successful, your computer should boot up normally.
- Remember to unplug your computer from the power source before attempting any further adjustments or component installations.
Using a Paperclip

When faced with a non-functional power button on your computer, a simple paperclip can come to the rescue. By using a paperclip as a makeshift power button, you can still power on your motherboard and get your computer up and running.
Explanation of Using a Paperclip
Using a paperclip to power on the motherboard involves creating a temporary connection between two specific pins. This simulates the action of pressing the power button, initiating the power-on mechanism.
Step-by-step Instructions:
- Before you begin, make sure your computer is unplugged from the power source.
- Locate the power button header on your motherboard. Refer to the user manual or the manufacturer’s website for its exact location.
- Identify the two power pins on the power button header. These pins are usually labeled as “Power SW” or “Power Switch.”
- Take note of the specific location of these power pins. They are typically small, metal pins sticking out from the motherboard.
- Straighten out a paperclip, leaving a small bend at one end for easy handling.
- Carefully insert the bent end of the paperclip into the two power pins, ensuring it makes contact with both pins simultaneously.
- Gently press the paperclip against the pins for a few seconds, creating a temporary connection.
- Remove the paper clip from the power pins once the connection has been made.
- Plug your computer back into the power source and press the power button as you normally would.
- If successful, your motherboard should power on, and your computer should boot up.
Using the PSU (Power Supply Unit)
When your computer’s power button fails, another option to power on your motherboard is the PSU (Power Supply Unit). In this guide, we’ll explore how the PSU plays a crucial role in providing power to the motherboard and learn how to manually turn it on to activate your computer.
Overview of the PSU’s Role
The PSU is like the heart of your computer, supplying power to all the components, including the motherboard. It converts the AC power from your wall outlet into the DC power required by your computer’s components, ensuring they receive a steady and reliable power supply.
Guide on Manually Turning on the PSU:
- Before you begin, ensure your computer is unplugged from the power source.
- Locate the PSU at the back of your computer case. It is a box-shaped unit with a fan and power cables.
- On the back of the PSU, look for a small switch or button. This is the manual power switch.
- Flip the switch to the “Off” position. If there’s a button, press it to turn off the PSU.
- Wait for a few seconds to allow any residual power to dissipate.
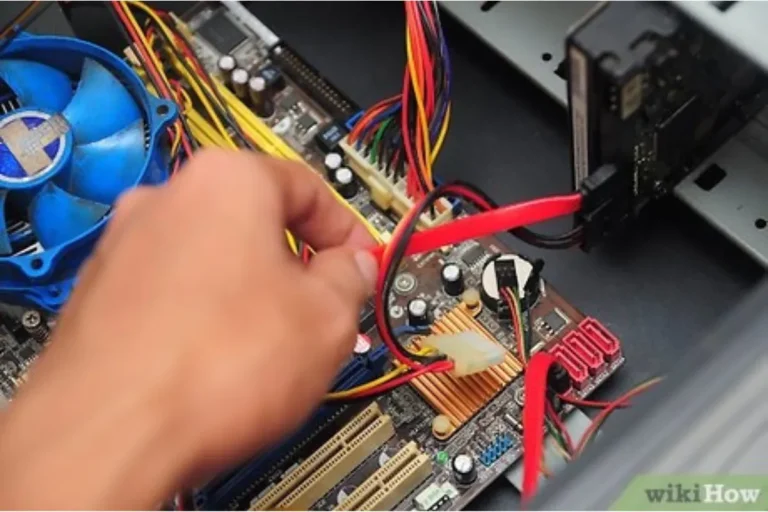
- Once the PSU is completely turned off, locate the 24-pin motherboard connector. It is a large, rectangular-shaped connector that plugs into the motherboard.
- Take a small piece of wire or a paperclip and bend it into a U-shape.
- Insert one end of the wire or paperclip into the green wire pin of the 24-pin connector.
- Insert the other end of the wire or paperclip into any black wire pin of the 24-pin connector. This completes the circuit.
- Plug your computer back into the power source and switch on the PSU using the manual switch or button.
- If successful, your motherboard should receive power, and you can press the power button to start your computer.
Frequently asked question
1. Why are safety precautions important when working with computer components?
Safety precautions are crucial when working with computer components to protect yourself from potential risks and prevent damage to the components.
2. How can I safely handle computer components?
To safely handle computer components, make sure to wear an anti-static wrist strap or ground yourself by touching a grounded metal object before handling any parts.
3. How can I avoid static electricity damage?
To avoid static electricity damage, work in an area with low humidity if possible. Wear an anti-static wrist strap connected to a grounded surface or use an anti-static mat. Avoid working on carpeted surfaces and wear clothing made of natural fibers.
4. What should I do if I accidentally spill liquid on computer components?
If you accidentally spill liquid on computer components, immediately power off and unplug the computer. Disconnect any affected components and dry them thoroughly using a lint-free cloth.
5. Are there any precautions I should take when working with power supply units (PSUs)?
When working with PSUs, it is essential to unplug the power cord and switch off the PSU before handling it.
Conclusion
In a pinch without a power button, you can still turn on your motherboard manually. By following a few simple steps, like locating the PSU switch, connecting the wires, and powering up, you can activate your computer without relying on the usual button. It’s a handy trick to have up your sleeve