What does a 3-pin connector look like on a motherboard?
Have you ever wondered what a 3-pin connector looks like on a motherboard? Well, wonder no more! In this article, we will take a closer look at these small but mighty connectors and explore their importance in your computer’s hardware setup.
Components of a 3-pin Connector
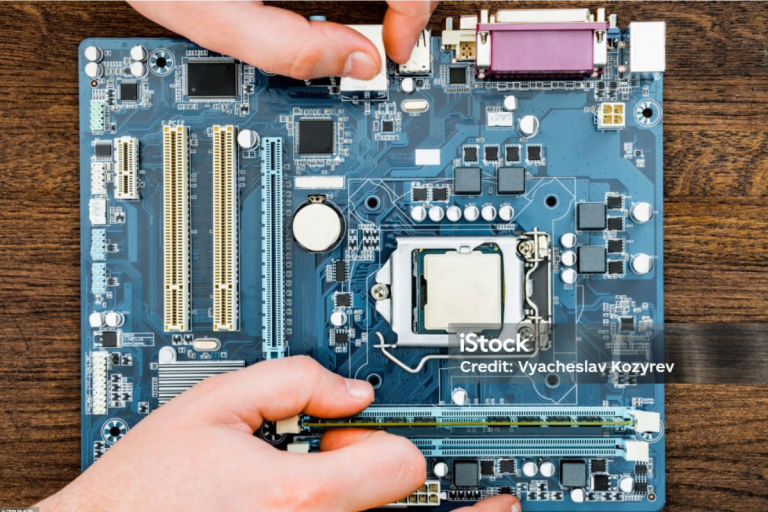
A 3-pin connector may seem like a tiny component on a motherboard, but it plays a crucial role in the functioning of various devices. The physical appearance, structure, and purpose of each pin in a 3-pin connector.
Physical Appearance and Structure
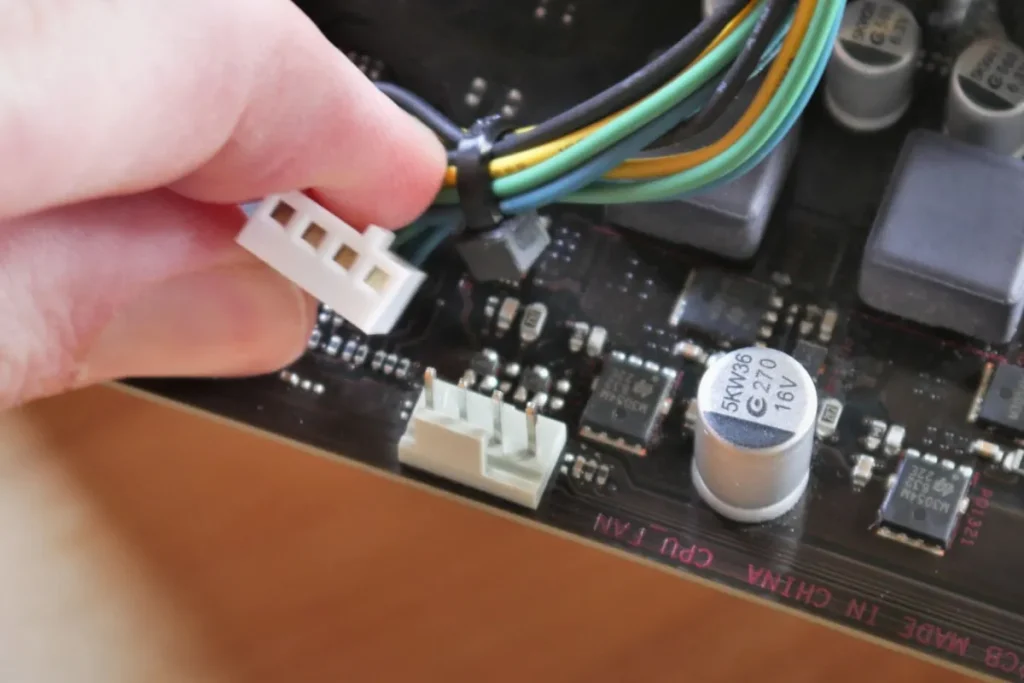
A 3-pin connector typically consists of three metal pins, which are arranged in a row. These pins are housed within a plastic housing that ensures proper alignment and stability. The connector is designed to fit securely into the corresponding socket on the motherboard.
Purpose of Each Pin
- Power Pin: The power pin, often labeled as “+12V” or “VCC,” is responsible for supplying electrical power to the device connected to the connector. It ensures that the device receives the necessary power to operate efficiently.
- Ground Pin: The ground pin, usually labeled as “GND,” serves as the electrical reference point. It provides a path for the electrical current to flow back to the power supply, completing the circuit. The ground pin helps in maintaining stability and preventing electrical interference.
- Control/Signal Pin: The control or signal pin, sometimes labeled as “SIGNAL” or “CONTROL,” is responsible for transmitting control signals or data between the device and the motherboard. It enables communication and coordination between the connected device and the system.
Types of Devices Connected to 3-pin Connectors
When it comes to 3-pin connectors on a motherboard, they serve as the lifeline for various devices that keep your computer running smoothly. The common devices that rely on these connectors and discover their importance in your system.
Overview of Common Devices
A 3-pin connector acts as a hub for connecting several essential components within your computer. Three of the most common devices that utilize 3-pin connectors are CPU fans, case fans, and water cooling pumps. These devices play a crucial role in maintaining optimal temperatures and ensuring the overall performance of your computer.
CPU Fans
The CPU fan, connected via a 3-pin connector, is responsible for cooling the processor. It helps dissipate the heat generated by the CPU during intensive tasks, preventing overheating and potential damage to the processor. A properly functioning CPU fan is vital for the longevity and stability of your computer.
Water Cooling Pumps
For those seeking advanced cooling solutions, water cooling pumps are often utilized. These pumps circulate coolant through the computer system, removing heat more effectively than traditional fans. The 3-pin connector allows the motherboard to control the speed and performance of the water cooling pump, optimizing cooling efficiency.
Identifying and Connecting a 3-pin Connector
To make the most out of your computer system, it’s important to know how to identify and properly connect devices to a 3-pin connector on your motherboard. In this section, we will guide you through the steps of locating and identifying these connectors, as well as the process of connecting devices to them.
Locating and Identifying a 3-pin Connector
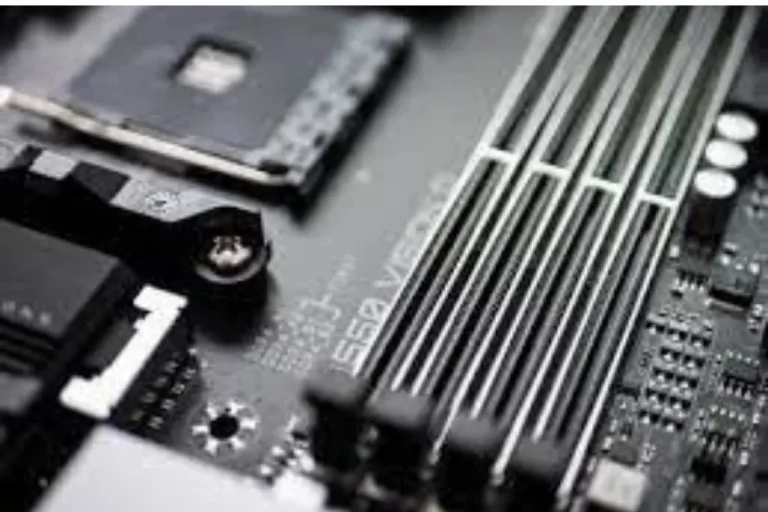
- Visual Inspection: Start by visually inspecting your motherboard. Look for small, rectangular connectors with three pins arranged in a row. These connectors are often labeled near the pins or in the motherboard’s documentation.
- Consulting the Manual: If you’re having trouble locating the 3-pin connectors, consult the motherboard’s manual. It will provide detailed diagrams and descriptions of the various connectors, making it easier for you to find the 3-pin connectors.
Connecting a Device to the 3-pin Connector
- Aligning the Pins: Ensure that the pins on the device’s connector match the pins on the motherboard’s 3-pin connector. Align them carefully to avoid bending or damaging the pins.
- Securing the Connection: Once aligned, gently push the device’s connector onto the motherboard’s 3-pin connector. Apply even pressure until it is securely attached. Take care not to force it or apply excessive pressure.
- Double-Checking: After connecting the device, double-check the connection to ensure it is snug and properly seated. A loose connection may result in intermittent operation or malfunctions.
Frequently Asked Questions
1. Why is my CPU fan not spinning when connected to a 3-pin connector?
Check if the fan is properly connected to the 3-pin connector. Ensure that the fan’s power cable is securely attached and that the connector is aligned correctly. If the issue persists, the fan may be faulty and require replacement.
2. My case fan connected to a 3-pin connector is making loud noises. What should I do?
First, check if the fan blades are obstructed by dust or debris. Clean the fan using compressed air or a soft brush. If the noise continues, the fan may be nearing the end of its lifespan and might need to be replaced.
3. Can I use a 4-pin fan with a 3-pin connector?
Yes, you can use a 4-pin fan with a 3-pin connector. Simply connect the fan’s 4-pin connector to the 3-pin connector on the motherboard, aligning the pins correctly. However, keep in mind that the fan’s speed control may be limited when using a 3-pin connector.
4. How often should I clean the devices connected via 3-pin connectors?
It is recommended to clean the devices connected via 3-pin connectors every 3 to 6 months, or more frequently if you notice dust buildup. Regular cleaning helps maintain optimal performance and prevents overheating.
5. My water cooling pump connected to a 3-pin connector is not functioning. What should I do?
Firstly, check if the pump is receiving power by ensuring the 3-pin connector is securely attached. If the pump still doesn’t work, verify that the pump’s power cable is not damaged.
Conclusion
Identifying a 3-pin connector on a motherboard is a simple task that can enhance your computer knowledge. These connectors can be easily recognized as small, rectangular connectors with three pins arranged in a row. By locating and properly connecting devices to these connectors, you can ensure optimal performance and functionality for your computer system.